THE CYCLE SHED.CO.UK

Wheel Building

Its not a black art, it's just a case of being patient and a bit of trial and error. I've tried to brake it down into easy steps but I would suggest finding an old wheel to try on first. You should be able to see if its going right when you put the second set of spokes through the hub.

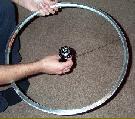
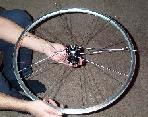
Turn the hub freewheel side up, drop a spoke through any spoke hole - this is you first drive spoke.

Locate the valve hole on the rim - this is used as a guide throughout the build process, put your drive spoke through the first drive side hole to the left of the valve hole and attach a nipple.

Drop a spoke through every other hole on the hub and then lightly attach a nipple ever fourth hole after your first drive spoke

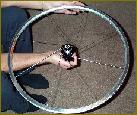
Turn the wheel over and twist the hub clockwise until the spokes are taut in the rim - nipples should only be half way down the threads on the spokes.

Position a spoke at the first hole to the left of the valve hole. Offer this up to the holes on the hub, this should line up almost exactly to one of the holes - drop the spoke through the hole and attach a nipple at the rim.

Drop a spoke through ever other hole on the hub and then lightly attach a spoke ever fourth hole after your first non-drive spoke.

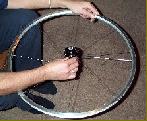
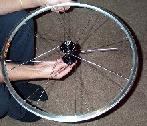
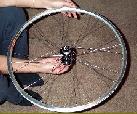
Now drop a spoke through ever empty hole on the drive side of the hub.

Turn the wheel over, now cross the free spokes over the existing drive side spokes - always slide the spoke under the last drive spoke before attaching it to the rim - this builds a stronger wheel.

Do the same with all new drive side spokes - at this point you should be able to tell if the wheel is ok - as roughly the same amount of thread should be visible at each nipple.

email: gil@thecycleshed.co.uk

The Front Door | Single Speed | Bike Gallery | Wheel Building | Local Rides | T-Shirts & Stickers | Offers | Interesting Stuff | Tell Me How Bad It Was