THE CYCLE SHED.CO.UK

Wheel Building

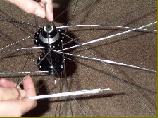
Now drop a spoke through ever empty hole on the non-drive side of the hub.

Turn the wheel over, now cross the free spokes over the existing non-drive side spokes - always slide the spoke under the last drive spoke before attaching it to the rim as on the drive side.

Do the same with all new non - drive side spokes - the wheel should now look almost complete.

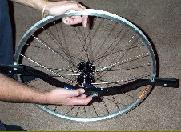
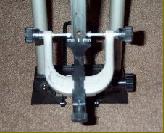
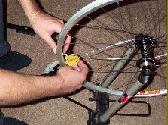
It is best to try and dish the wheel firstly while the spokes are still fairly loose - all you are doing is balancing the hub to the left and right of the centre of the rim. If you use the valve hole as a guide again, put the stick horizontally across the wheel and tighten the gauge onto the locknuts on the drive side.

Now spin the wheel over and do the same on the non-drive side - the feet of the stick should just touch the rim before the lock nuts stop it. If the feet are above the rim tighten the non-drive side spokes 1/2 a turn - if the gauge hits the locknuts first flip the wheel over and tighten the drive side spokes 1/2 turn.

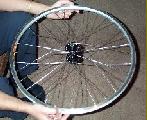
When the hub is centred with the rim drop it into a truing stand.
First adjust the hoop of the rim (the up and down movement) - tighten the gauge until it is just touching the rim edge at the valve hole.

Spin the wheel - the wheel should be at the same level the whole way round, if it clips the gauge, tighten the 3 or 4 spokes around where it catches the gauge until it just clears the gauge - work with the whole wheel, not just one section at a time.

When the rim has no hoop to it it's time to adjust the movement to the left and right or buckle - this is just a case of adjusting the tension on the spoke until there is no movement to the left or right. If the rim moves to the left--tighten the spoke on the right side  and visa versa.

To get in touch

email: gil@thecycleshed.co.uk

The Front Door | Single Speed | Bike Gallery | Wheel Building | Local Rides | T-Shirts & Stickers | Offers | Interesting Stuff | Tell Me How Bad It Was